
Swift and Objective-C are two main programming languages used for macOS and iOS app development. Swift, introduced by Apple in 2014, is designed to be a modern, safer, and more performant language compared to Objective-C. However, Objective-C remains a significant part of many existing codebases.
Therefore, integrating Swift with Objective-C is a common task for developers who want to take advantage of Swift while maintaining existing Objective-C code. This article explores advanced techniques for integrating Swift with Objective-C, along with relevant code examples, facts, and statistics. Elinext’s article on tech trends that are shaping our future provides context on the broader forces driving digitalisation across industries — from AI adoption and edge computing to the changing economics of software delivery — offering a useful frame for understanding where specific technology investments fit into the wider market trajectory.
Benefits of Integrating Swift with Objective-C
-
Improved Performance and Safety
Swift offers significant performance improvements and security features. Its syntax is more concise, and it reduces common coding errors through type safety and error handling. This makes Swift a preferred choice for new development.
-
Reusability of Existing Code
Many legacy projects have a substantial Objective-C code base. Rewriting these entirely in Swift is often impractical. Integrating Swift with Objective-C allows developers to gradually modernize their apps without starting from scratch.
-
Access to Latest Features
Swift is frequently updated with new features and improvements, allowing developers to to take advantage of the latest advances in iOS and macOS development.
Bridging Swift and Objective-C
Using Bridging Headers
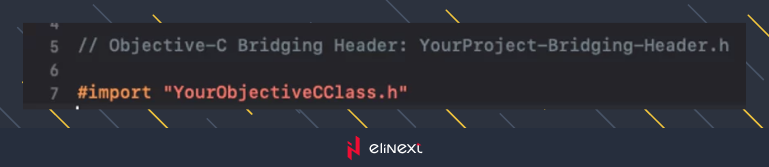
To use Objective-C code in Swift, you need a bridging header. This header file allows Swift to recognize and use Objective-C classes, methods, and properties.
-
Create a Bridging Header
When adding Swift to an existing Objective-C project, Xcode typically asks if you want to create a bridging header. If not, you can create one manually.
-
Import Bridging Header in Swift
Ensure your bridging header is referenced in your project’s build settings under `Objective-C Bridging Header`.
Exposing Swift to Objective-C
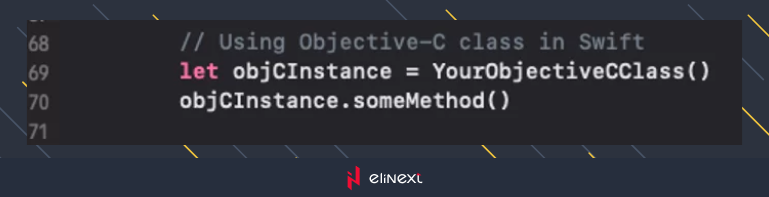
To use Swift code in Objective-C, you need to make the Swift code available by importing the automatically generated Swift header file.
-
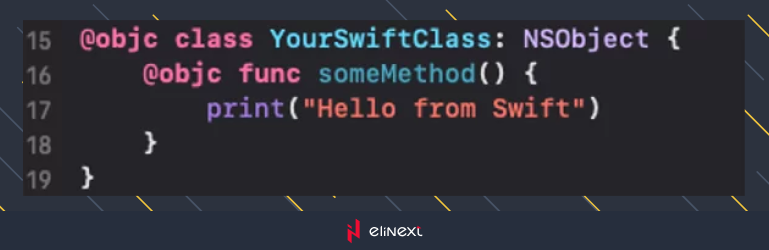
Mark Swift Classes with `@objc`
Annotate your Swift classes and methods with `@objc` to make them available to Objective-C.
-
Import Swift Header in Objective-C
Import the Swift-generated header in your Objective-C files.

Advanced Techniques for Seamless Integration
Mixed Language Targets
You can have targets in different languages, where the target includes Swift and Objective-C files.This allows for more granular integration and makes it easier to manage large code bases.
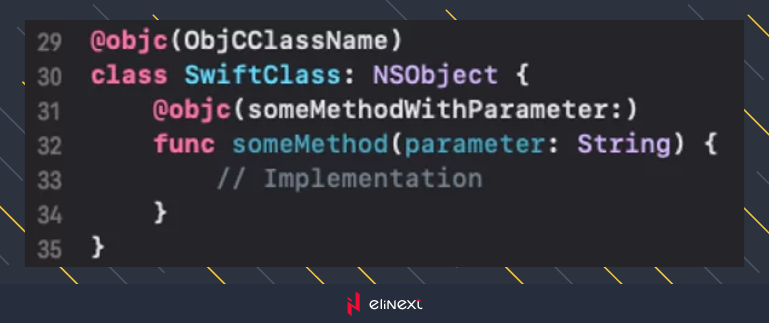
Handling Name Conflicts
Swift automatically translates Objective-C method names to Swift-style names. However, this can sometimes lead to name conflicts. Use @objc annotations to resolve these conflicts by explicitly specifying Objective-C names.
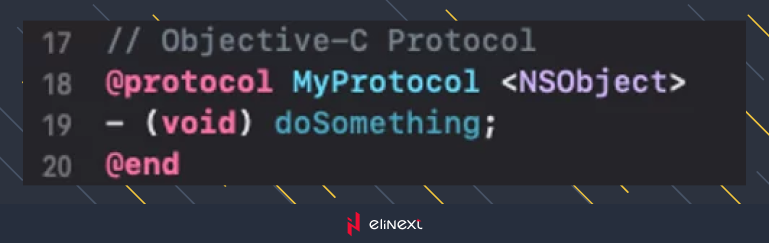
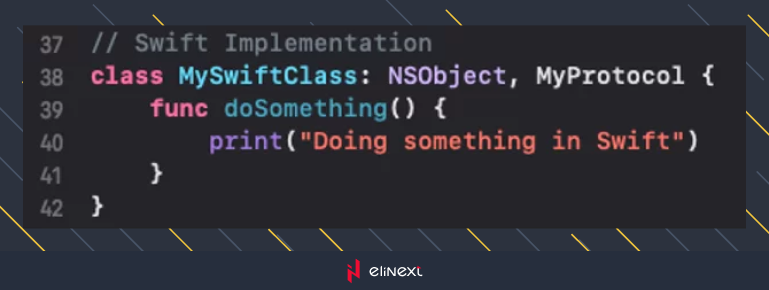
Using Protocols
Protocols are a powerful way to define common interfaces between Swift and Objective-C. Define a protocol in Objective-C and implement it in Swift.
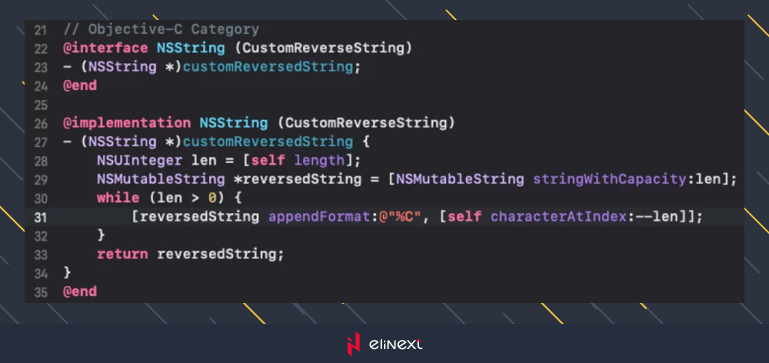
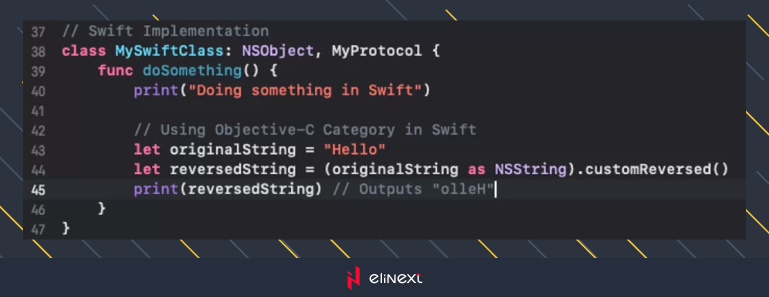
Categories and Extensions
Use Objective-C categories and Swift extensions to extend classes’ functionality across language boundaries.
Real-World Statistics and Adoption
Adoption Rates
Since the introduction of Swift, it has gained rapid adoption. According to a 2023 Stack Overflow Developer Survey, Swift is one of the top 10 favorite languages, with 60% of developers expressing interest in continuing to use it.
Performance Improvements
Apple’s benchmarks show that Swift is up to 2.6 times faster than Objective-C and up to 8.4 times faster than Python for certain tasks. This significant performance boost is a key factor for developers migrating to Swift.
LinkedIn Example
Many famous apps, such as LinkedIn, Lyft, and Airbnb, use a combination of Swift and Objective-C. This hybrid approach allows them to gradually adopt Swift while maintaining and improving their existing codebases.
LinkedIn, one of the largest professional networking platforms, uses a combination of Swift and Objective-C in its iOS application to leverage the strengths of both languages while ensuring the app’s performance and maintainability. Here’s a more detailed description of how and why LinkedIn uses this hybrid approach:
Historical Context
The LinkedIn iOS app was originally written in Objective-C, like many older apps developed before Swift was introduced in 2014. Objective-C was the primary language for iOS development at that time, and LinkedIn’s codebase had been updated with numerous features and integrations over the years.
Gradual Transition to Swift
When Swift was introduced, LinkedIn started exploring its potential benefits such as better performance, modern syntax, safety features, and improved readability. However, it was impossible to completely rewrite an application as large as LinkedIn. Instead, LinkedIn opted for a gradual transition to Swift. This approach allowed them to gradually modernize their codebase without breaking the existing application.
Conclusion
Integrating Swift with Objective-C offers a pragmatic approach to modernizing existing iOS and macOS applications. By using linking headers, the `@objc` annotation, and best practices such as targets and protocols in different languages, developers can take advantage of Swift’s modern features and performance improvements while maintaining their investment in Objective-C code.
As Swift continues to evolve, mastering this integration will become increasingly valuable, ensuring that your applications remain performant, maintainable, and up-to-date with the latest advancements in Apple’s ecosystem.
About the Author
Than is a lead iOS developer and mobile tech lead at Elinext with over 10 years of experience in mobile development. He specializes in iOS, Android, React Native, and Flutter — delivering high-performance, user-friendly mobile applications for clients across diverse industries.